The interesting menu for your site with the Float Menu Pro plugin
When you design the future website, special attention is paid to the appearance, structure and usability of the menu. Bright and catchy navigation panels attract the attention of visitors to the page. This panels become a real highlight of the resource and contribute to the influx of new users.
A variety of floating menus has become the common practice in the network. They significantly increase the site usability. Comfortable-to-use solutions move around the page when you scroll it. The navigation is always available to the user, allowing you to find the desired information quickly.
Creating the menu based on the Float Menu Pro plugin
We implement the non-standard menu using the functional plugin Float Menu Pro for WordPress sites. Develop the menu structure using the example of the typical IT company. Use template menu items to create navigation. Display the list of services such as the submenu items.
- Our services:
- layout and design;
- site development;
- testing;
- web analytics;
- filling content;
- site optimization;
- SEO and SMM promotion;
- maintenance and administration.
- About us.
- Our customers.
- Share on Facebook.
Use the Float Menu Pro plugin to create quickly and easily the interesting menu on your web resource.
General setup of menu, submenu and modal window
Use the “Style” options to edit the navigation display on the site. In the subsection “Menu”:
- define the menu location on the left;
- align it to the center of the page;
- select the round shape of the elements;
- add indents between the menu items and the resource boundary;
- connect the labels of the navigation elements;
- define the type of label display to the menu and set indents for it;
- set the effect (Slide) and the speed of label appearance (400 ms).
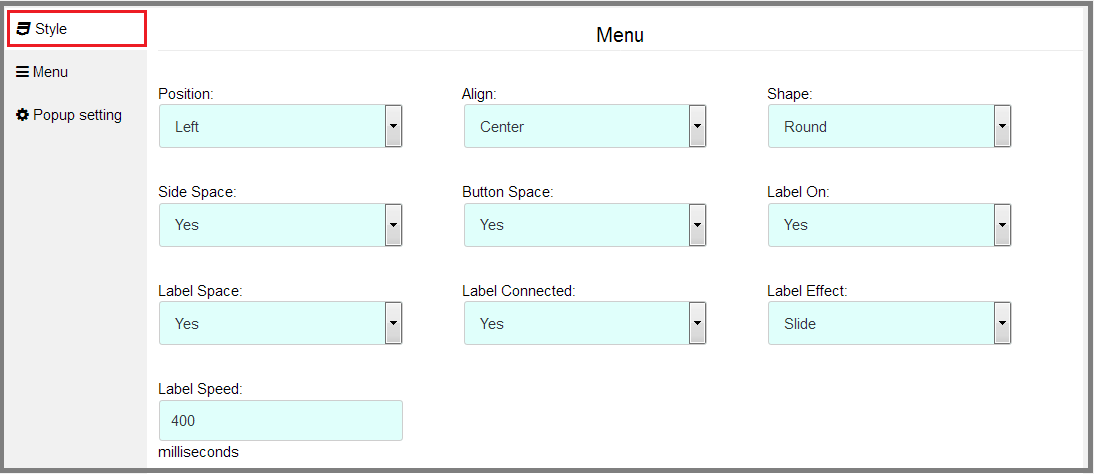
Fig. 1 General options for the navigation bar
To edit the submenu display, use the “Sub Menu” section in the “Style”:
- choose the type of display for all elements;
- leave space between points;
- set the appearing effect (Fade);
- determine the animation speed – 400 ms.
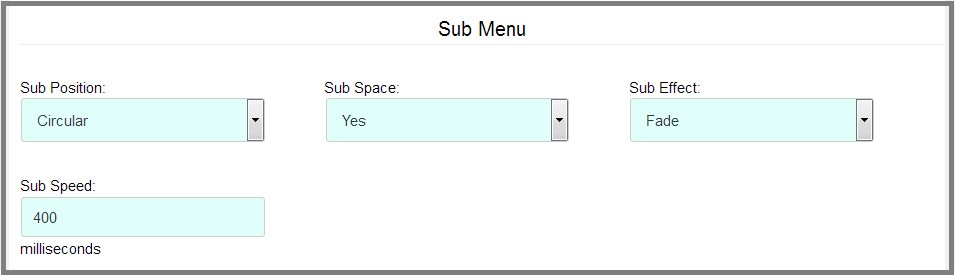
Fig. 2 Set the display of menu sub-items
Another section “Popup” is intended for setting general parameters for the modal window. With the help of basic options, change:
- the position of the floating block relative to the horizontal axis – in the center;
- vertical position – in the center;
- display of the corners;
- the color spectrum of the window.

Fig. 3 Basic options to edit the modal window
Add items to the navigation bar
Set parameters for each individual element through the “Menu” section. Let’s create the main navigation items. The first configuration block serves as the container. When you add the submenu, it becomes inactive. To configure it:
- set the displayed icon;
- change the background;
- select the color of the graphic element and the label.
The name and type of the container element are ignored.

Fig. 4 Settings for the container base menu
To add new items, you must use the “Add item” button. The submenu items are indicated by setting the Sub item checkbox. All marked items will be displayed on the site through the container menu. Use sub-items for the main services of the company.
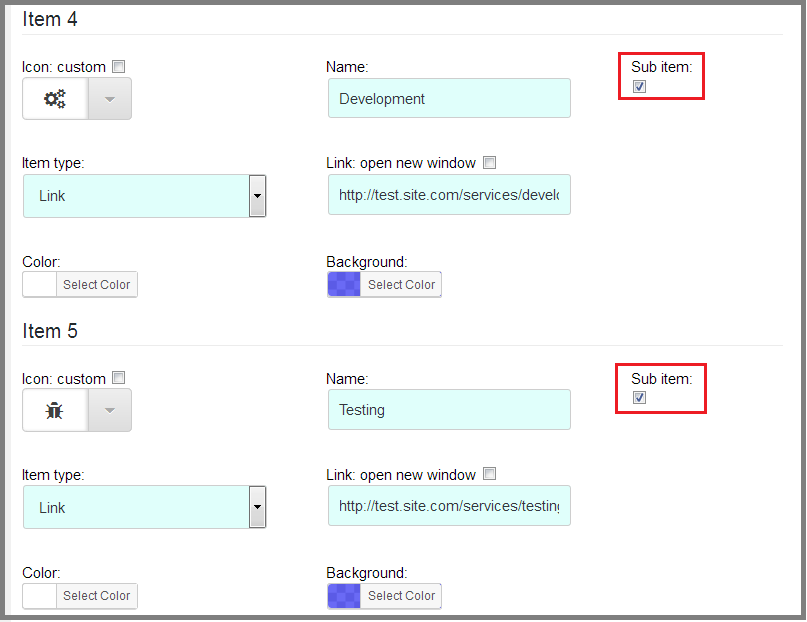
Fig. 5 Adding sub-items in the menu
The rest of the menu items are added similarly to the container. They include links to the relevant pages of the site. There is no need in putting the check mark.

Fig. 6 The element of the main menu
The menu item “Contacts” is implemented through the built-in modal plugin window. To do this, select the Popup type of the element.

Fig. 7 Connect the output of the modal window
The menu button “Share on Facebook” will allow sharing useful information. To implement it, choose the type of “Share” and the desired social network.
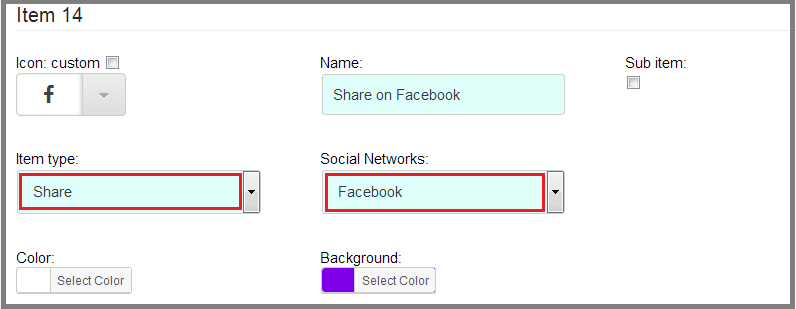
Fig. 8 Interaction with the Facebook social network
Use the built-in print function to create the menu item “Print”.
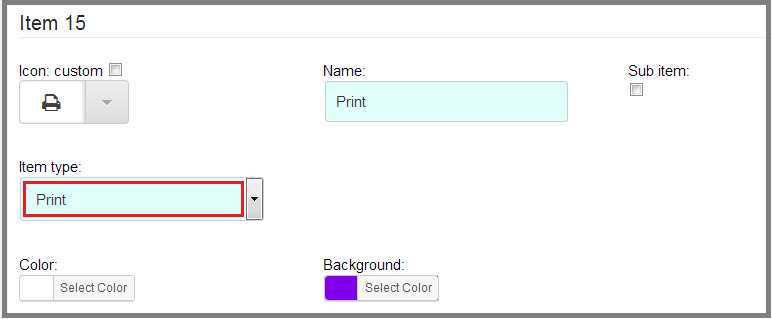
Fig. 9 Options of the print button for the main menu
The modal window content
To determine the content of the built-in modal window, use the “Popup setting” section. Through its parameters:
- specify the title of the popup block;
- write the text message for the user;
- insert the shortcode form to collect contact information;
- locate the content in the center of the window.
The unique plugin Wow Form Pro helps you to create the form of any complexity.

Fig. 10 Adding content to the modal window
Use the additional menu to set the navigation display. Choose the displaying on all pages of the resource and for users with any status.
The floating menu with sub-items will look interesting on your site. If necessary, you can always change the style of its display.
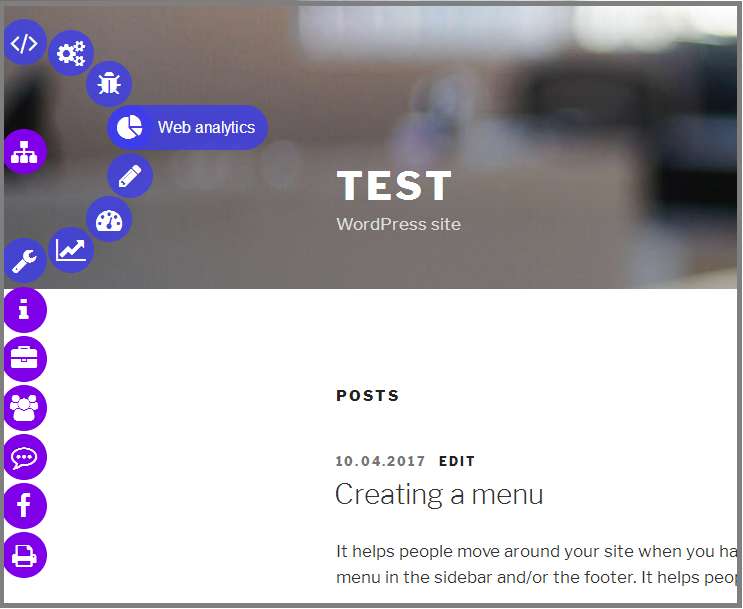
Fig. 11 The menu with sub-items on the site
Select “Contacts” to check the result of saving the modal window parameters.

Fig. 12 Display the modal window
P.S.
Use Float Menu Pro to create and customize bright non-standard menus. Arouse interest of the page visitors changing navigation options on your requests.